Info:
Svg Grid Highlight With Inkscape
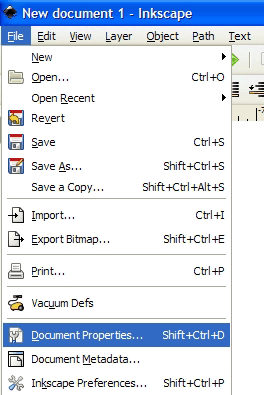
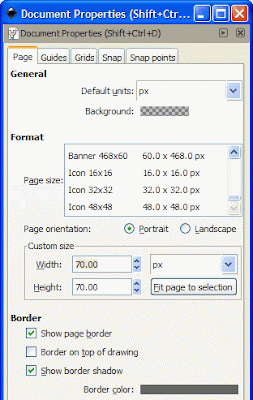
Open Inkscape and go to File/Document Properties and in the Properties window set the size of your document, I chose 70*70 for this element.
I was asked how to make an element in Inkscape, one that I had done in Illustrator.
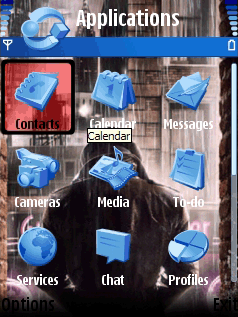
I don't really use Inkscape so bare with me, the element in question was this one [or similar at least].
Just a border with a transparent window.
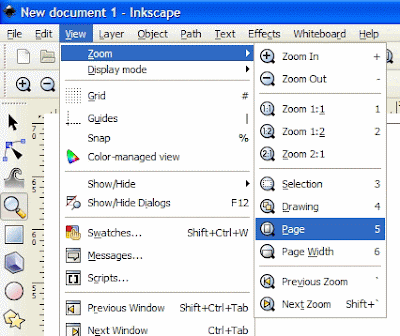
Next go to View/Zoom/Page to fill the window with your document, also go to Object/Fill and Stroke, to bring up that settings box.
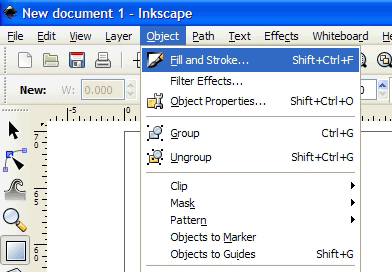
Now select the square shape tool, in the fill and stroke settings under stroke style, change the width to zero,if it isn't already [inkscape seems to save and use your previous settings,so these may all be different on your PC].
Draw your shape by clicking and dragging to the size required, if you want rounded edges, there are two boxes labelled Rx & Ry ,you can input two of the same numbers in here to give an even curve, there is also round slider options on the top right corner of your shape, you can move these to set the curve as well.
Set the colour of your shape[this will be the border colour] with the colour slider along the bottom or in the fill tab in the fill and stroke settings box.I set it to black.
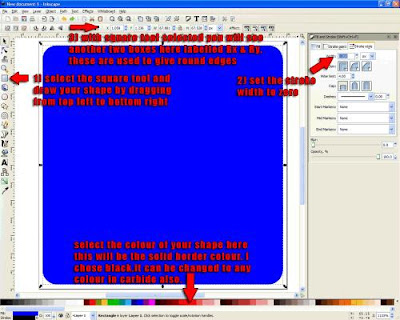
Once your happy with the size and shape make sure it is selected [go to edit/select all]
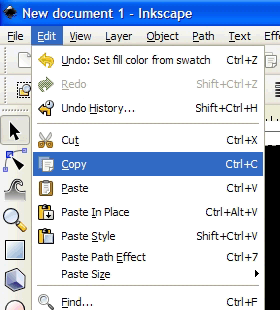
then go to Edit/Copy then Edit/Paste in Place, this pastes a copy on top of your existing shape, change the colour of it to something different,any it doesn't matter so long as it's not the same, I chose red.
Next go to Object/Transform
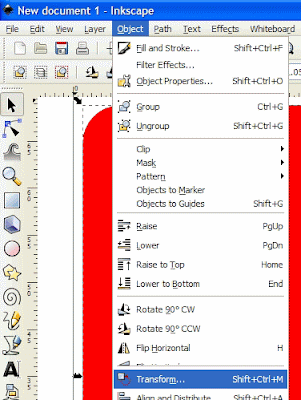
A Transform box will come up next to where the Fill and Stroke box is, I changed these settings to width and height 90% ,under the Scale Tab,and pressed apply, you should now have the screen below.
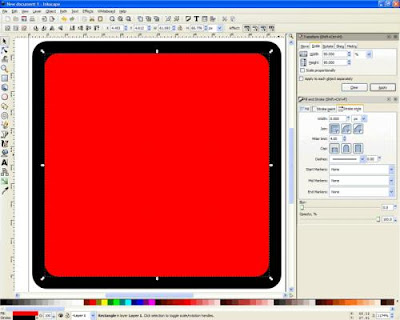
Could be used here as a simple highlight, there are also gradient settings etc in the Fill options.
Now to make the centre transparent.
Go to Edit/Select All then Path/Combine.
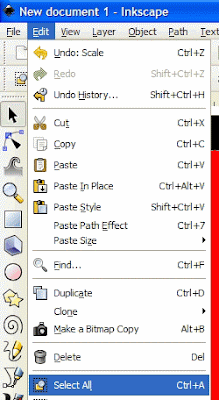
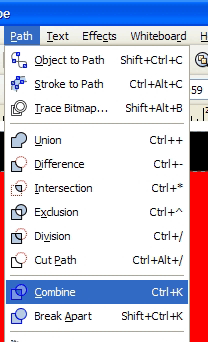
This will remove the red inner square and also the same shape from the black square underneath.
You should now be left with this..
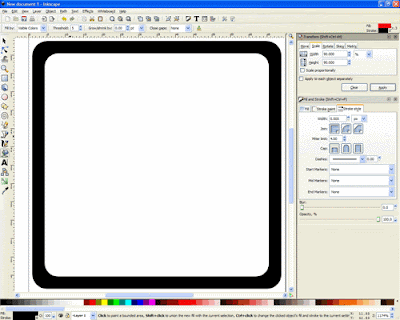
That centre is transparent, so you could use that as it is if you wanted just a 'frame effect'
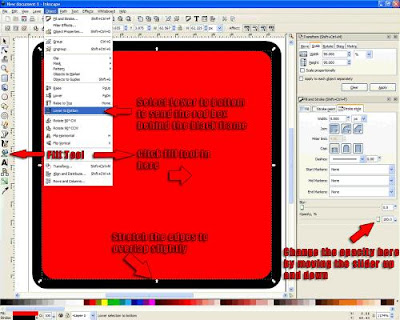
To give it a transparent colour, select the fill tool and click in the centre of your square, it should fill with your last chosen colour, you can change this using the same method as before.
Now when I did this there was a slight gap between the 'frame' and the fill, just simply drag the edges over at each side until it covers, don't worry about it overlapping your border, just go to Object/Lower to Bottom, to send that layer behind your border.
To make it transparent, go back over to your Fill and Stroke settings, and, with just your centre layer selected, you can change the opacity by using the slider.
Of course you can use the same method for any element, just change the sizes, and also the colours can be changed in carbide so you can reuse them in different themes with different colours.
All Credits to RobJM of MMC
For Help And Support Visit Our Forum Mob9.uuuq.com
Share This Post :


0 comments:
Post a Comment
Post Your Comments Here